如何用 Inference Endpoints 部署 MusicGen 音乐生成模型
Deploy MusicGen in no time with Inference Endpoints
Hugging Face 发布教程,讲解如何通过 Inference Endpoints 和自定义 handler 部署 facebook/musicgen-large 音乐生成模型。
教程给出从复制仓库到编写 handler.py 再创建 Inference Endpoints 的完整步骤,方法可迁移到 Hub 上没有 pipeline 的其他模型。
MusicGen 是一个强大的音乐生成模型,它接收文本提示和可选的旋律来输出音乐。这篇博客文章将指导你使用 Inference Endpoints 通过 MusicGen 生成音乐。
Inference Endpoints 允许我们编写自定义推理函数,称为 custom handlers。当模型不被 transformers 高级抽象 pipeline 开箱即用地支持时,这些函数特别有用。
transformers pipelines 提供了强大的抽象,用于运行基于 transformers 的模型的推理。Inference Endpoints 利用 pipeline API,只需点击几下即可轻松部署模型。然而,Inference Endpoints 也可用于部署没有 pipeline 的模型,甚至非 transformer 模型!这是通过我们称为 custom handler 的自定义推理函数实现的。
让我们以 MusicGen 为例演示这个过程。要为 MusicGen 实现自定义处理函数并部署它,我们需要:
- 复制我们想要服务的 MusicGen 仓库,
- 在
handler.py中编写自定义处理程序,并在requirements.txt中编写任何依赖项,然后将它们添加到复制的仓库中, - 为该仓库创建 Inference Endpoint。
或者直接使用最终结果并部署我们的 custom MusicGen model repo,我们只是按照上述步骤操作了 :)
开始吧!
首先,我们将使用 repository duplicator 将 facebook/musicgen-large 仓库复制到我们自己的个人资料中。
然后,我们将把 handler.py 和 requirements.txt 添加到复制的仓库中。
首先,让我们看看如何使用 MusicGen 运行推理。
from transformers import AutoProcessor, MusicgenForConditionalGeneration

processor = AutoProcessor.from_pretrained("facebook/musicgen-large")
model = MusicgenForConditionalGeneration.from_pretrained("facebook/musicgen-large")

inputs = processor(
    text=["80s pop track with bassy drums and synth"],
    padding=True,
    return_tensors="pt",
)
audio_values = model.generate(**inputs, do_sample=True, guidance_scale=3, max_new_tokens=256)
让我们听听它听起来如何:
可选地,你还可以使用音频片段对输出进行条件化,即生成一个补充片段,将文本生成的音频与输入音频相结合。
from transformers import AutoProcessor, MusicgenForConditionalGeneration
from datasets import load_dataset

processor = AutoProcessor.from_pretrained("facebook/musicgen-large")
model = MusicgenForConditionalGeneration.from_pretrained("facebook/musicgen-large")

dataset = load_dataset("sanchit-gandhi/gtzan", split="train", streaming=True)
sample = next(iter(dataset))["audio"]

# take the first half of the audio sample
sample["array"] = sample["array"][: len(sample["array"]) // 2]

inputs = processor(
    audio=sample["array"],
    sampling_rate=sample["sampling_rate"],
    text=["80s blues track with groovy saxophone"],
    padding=True,
    return_tensors="pt",
)
audio_values = model.generate(**inputs, do_sample=True, guidance_scale=3, max_new_tokens=256)
让我们听一听:
在这两种情况下,model.generate 方法都会生成音频,并遵循与文本生成相同的原则。你可以在我们的 how to generate 博客文章中阅读更多相关内容。
好的!根据上面概述的基本用法,让我们为了乐趣和收益部署 MusicGen!
首先,我们将在 handler.py 中定义一个自定义处理程序。我们可以使用 Inference Endpoints template,并用我们的自定义推理代码覆盖 __init__ 和 __call__ 方法。__init__ 将初始化模型和处理器,__call__ 将接收数据并返回生成的音乐。你可以在下面找到修改后的 EndpointHandler 类。👇
from typing import Dict, List, Any
from transformers import AutoProcessor, MusicgenForConditionalGeneration
import torch

class EndpointHandler:
    def __init__(self, path=""):
        # load model and processor from path
        self.processor = AutoProcessor.from_pretrained(path)
        self.model = MusicgenForConditionalGeneration.from_pretrained(path, torch_dtype=torch.float16).to("cuda")

    def __call__(self, data: Dict[str, Any]) -> Dict[str, str]:
        """
        Args:
            data (:dict:):
                The payload with the text prompt and generation parameters.
        """
        # process input
        inputs = data.pop("inputs", data)
        parameters = data.pop("parameters", None)

        # preprocess
        inputs = self.processor(
            text=[inputs],
            padding=True,
            return_tensors="pt",).to("cuda")

        # pass inputs with all kwargs in data
        if parameters is not None:
            with torch.autocast("cuda"):
                outputs = self.model.generate(**inputs, **parameters)
        else:
            with torch.autocast("cuda"):
                outputs = self.model.generate(**inputs,)

        # postprocess the prediction
        prediction = outputs[0].cpu().numpy().tolist()

        return [{"generated_audio": prediction}]
为了简单起见,在这个例子中我们只从文本生成音频,而不使用旋律对其进行条件化。
接下来,我们将创建一个 requirements.txt 文件,包含运行推理代码所需的所有依赖项:
transformers==4.31.0
accelerate>=0.20.3
将这两个文件上传到我们的仓库就足以服务该模型。
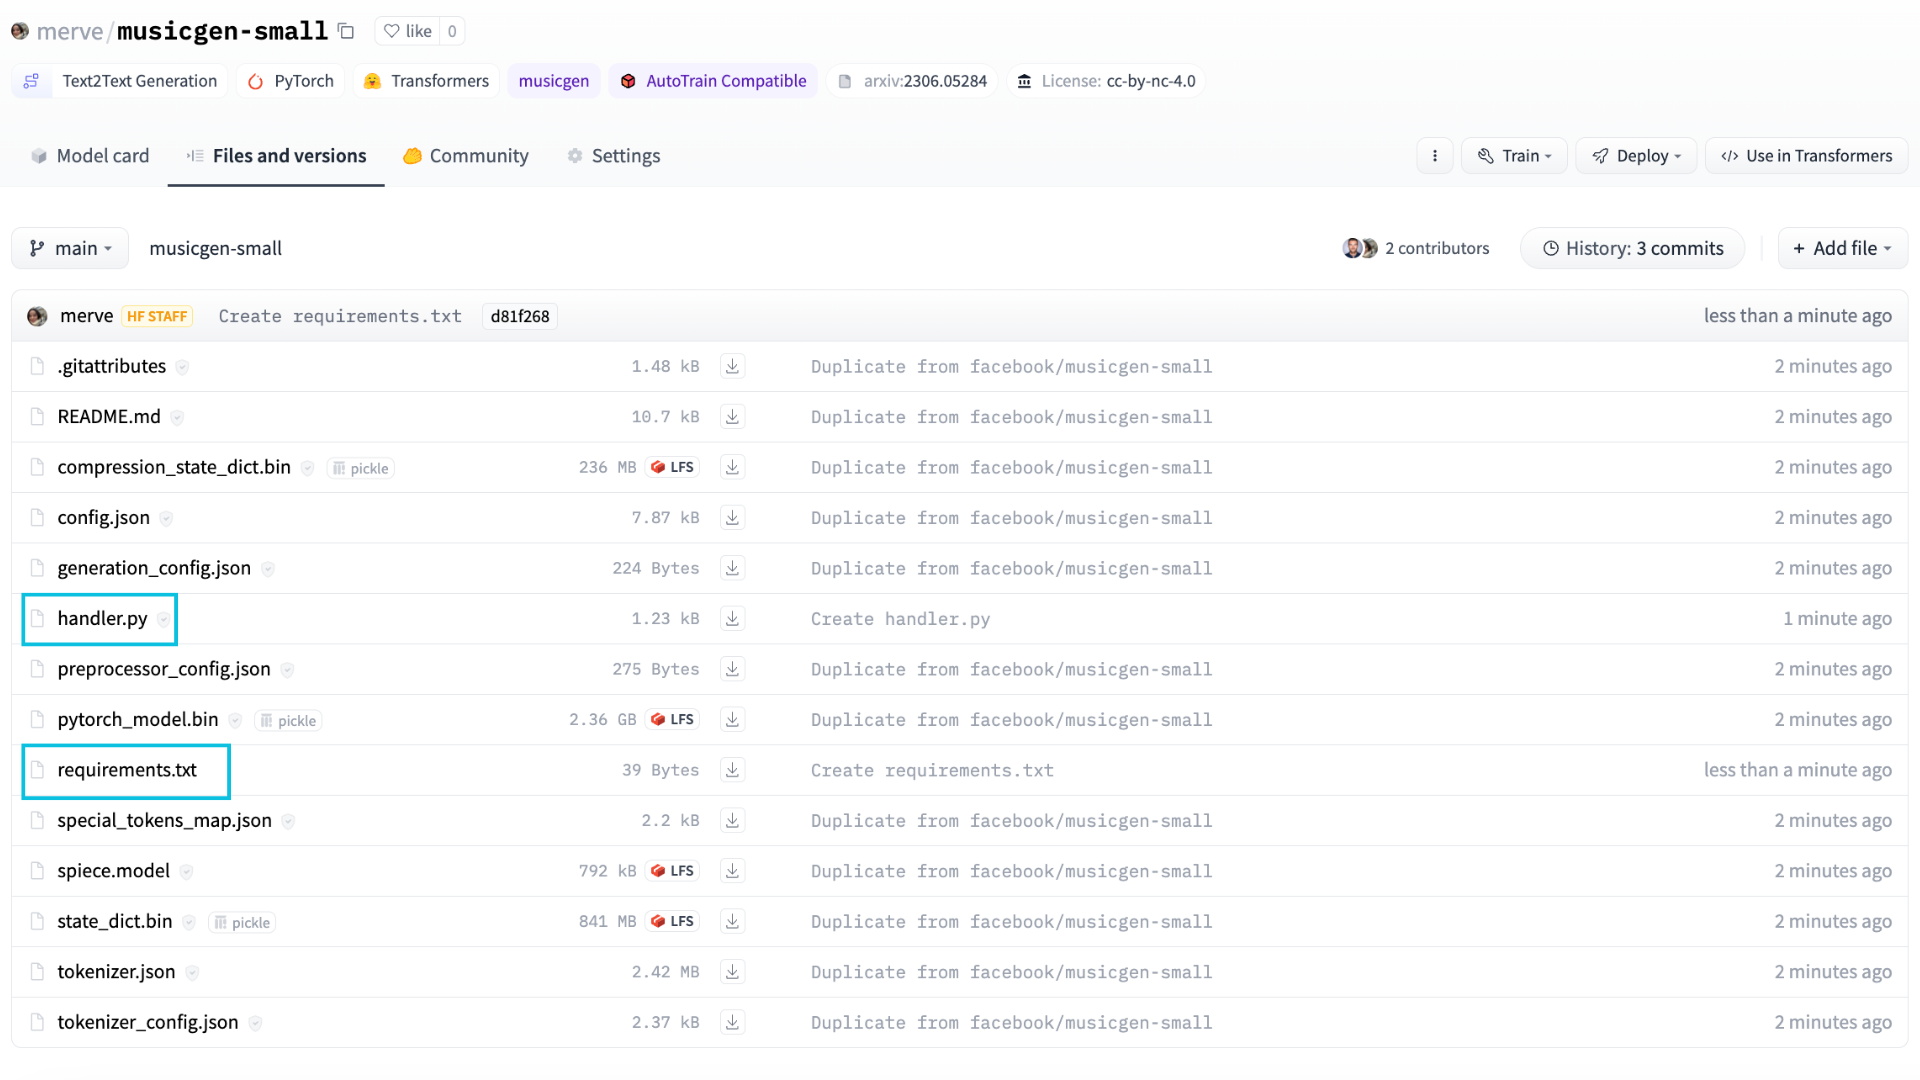
我们现在可以创建 Inference Endpoint。前往 Inference Endpoints 页面并点击 Deploy your first model。在“Model repository”字段中,输入你复制的仓库的标识符。然后选择你想要的硬件并创建端点。任何至少有 16 GB RAM 的实例都应该适用于 musicgen-large。

创建端点后,它将自动启动并准备好接收请求。
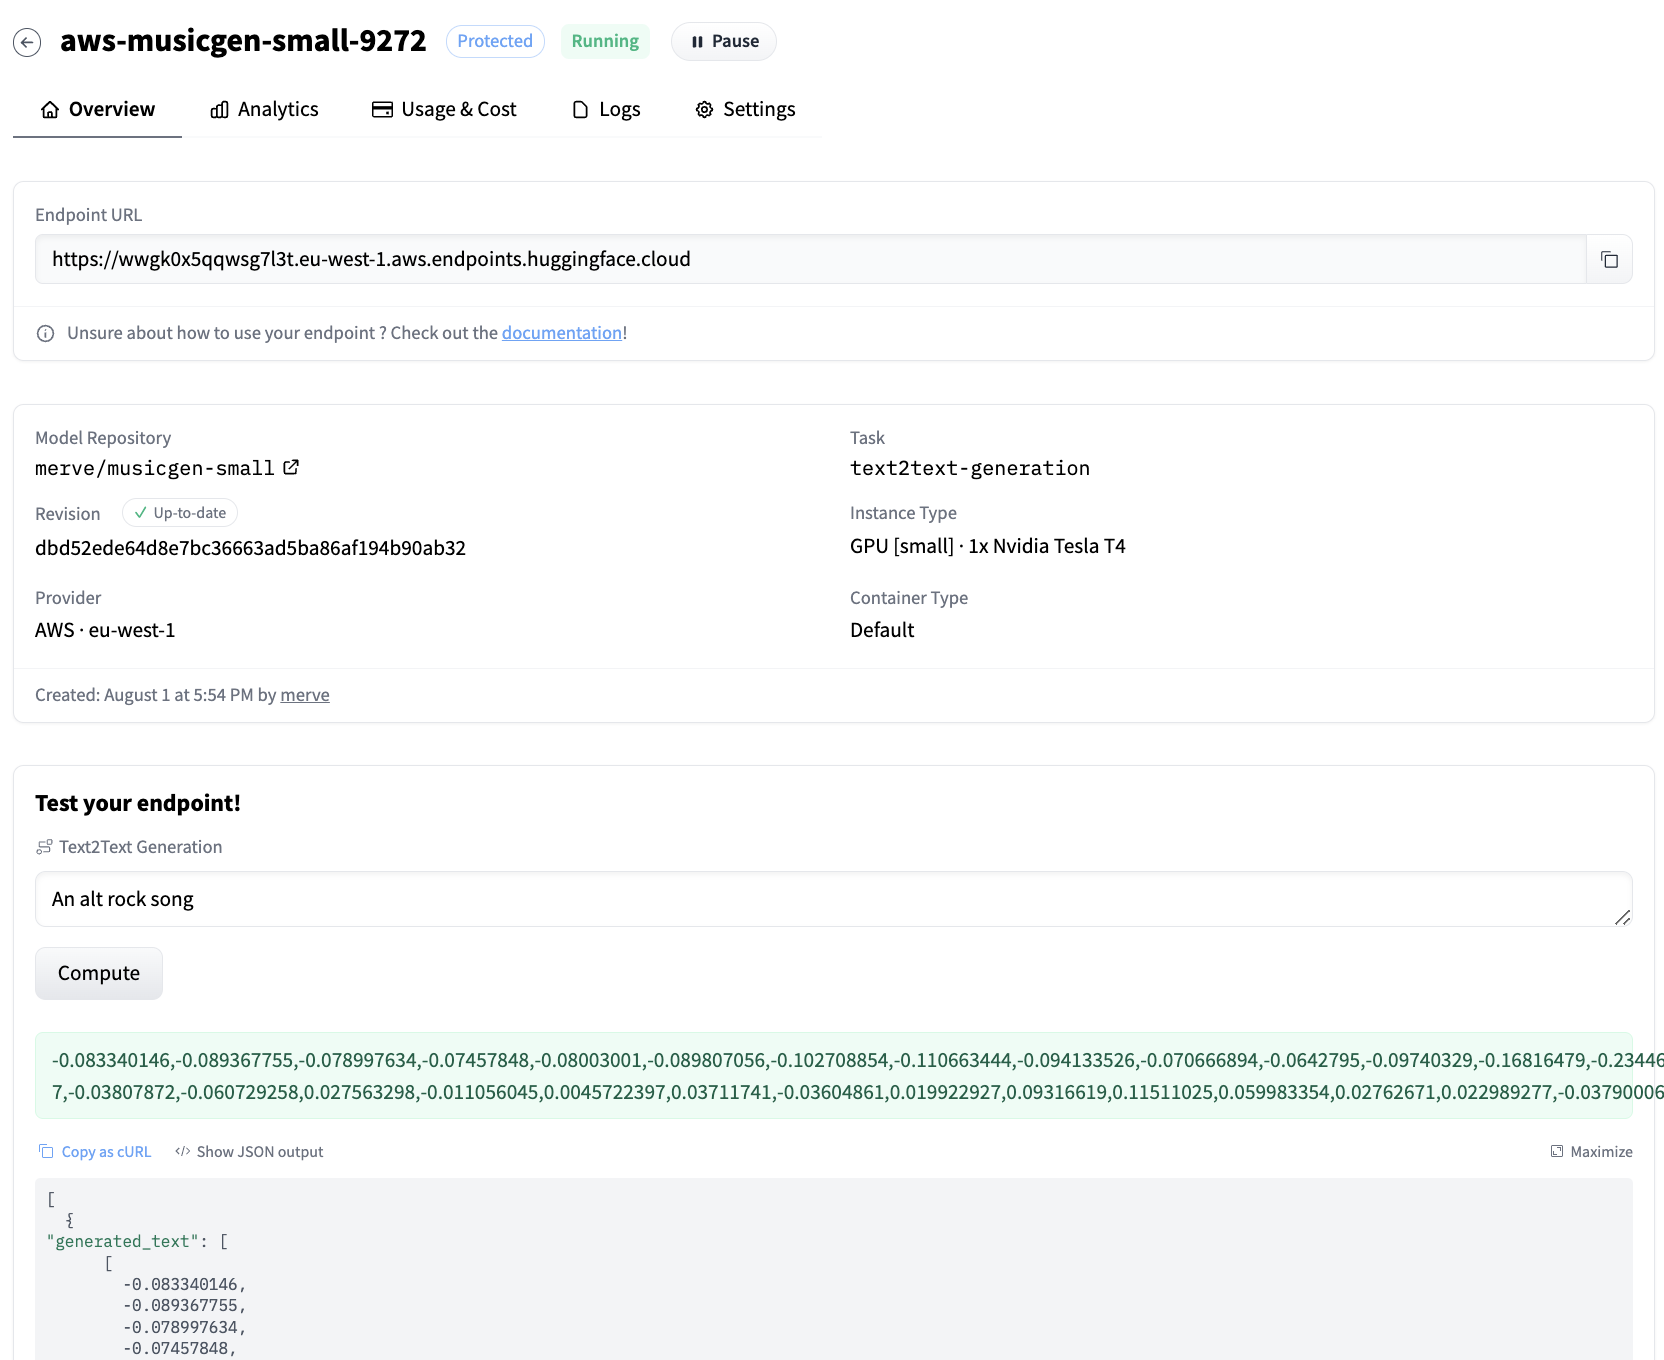
我们可以使用下面的代码片段查询端点。
curl URL_OF_ENDPOINT \
-X POST \
-d '{"inputs":"happy folk song, cheerful and lively"}' \
-H "Authorization: {YOUR_TOKEN_HERE}" \
-H "Content-Type: application/json"
我们可以看到以下波形序列作为输出。
[{"generated_audio":[[-0.024490159,-0.03154691,-0.0079551935,-0.003828604, ...]]}]
它听起来是这样的:
你也可以使用 huggingface-hub Python 库的 InferenceClient 类来访问端点。
from huggingface_hub import InferenceClient

client = InferenceClient(model = URL_OF_ENDPOINT)
response = client.post(json={"inputs":"an alt rock song"})
# response looks like this b'[{"generated_text":[[-0.182352,-0.17802449, ...]]}]

output = eval(response)[0]["generated_audio"]
你可以随意将生成的序列转换为音频。你可以使用 Python 中的 scipy 将其写入 .wav 文件。
import scipy
import numpy as np

# output is [[-0.182352,-0.17802449, ...]]
scipy.io.wavfile.write("musicgen_out.wav", rate=32000, data=np.array(output[0]))
瞧!
试用下面的演示来体验该端点。
结论
在这篇博客文章中,我们展示了如何使用带有自定义推理处理程序的 Inference Endpoints 来部署 MusicGen。同样的技术也可用于 Hub 中任何没有关联管道的其他模型。你只需在 handler.py 中覆盖 Endpoint Handler 类,并添加 requirements.txt 以反映你项目的依赖项即可。
阅读更多
来源:Hugging Face:Blog(RSS) · huggingface.co